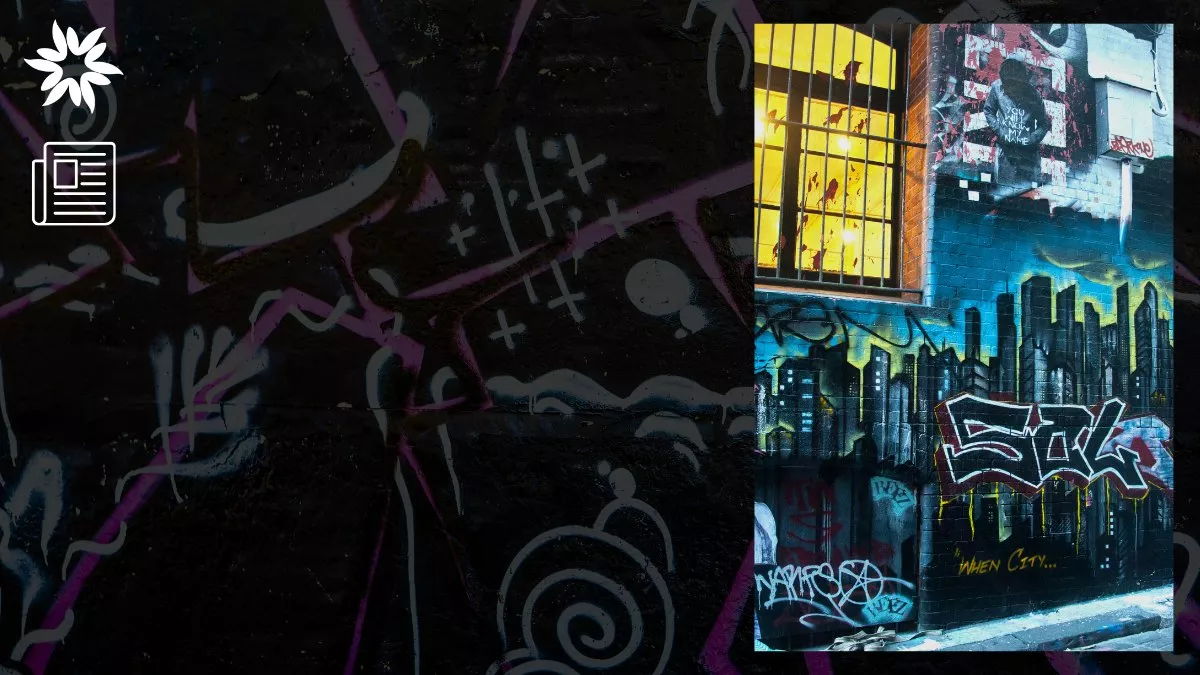
Graffiti is an art style that embodies standing out.
If you’ve ever seen a colorful mural or cool tag and thought, “I want to do that,” you’re in the right place.
Learning graffiti is much more than throwing paint on a wall—it’s about creating something with your style and message.
Starting might seem overwhelming, given all the tools, colors, and techniques available. But don’t worry; we’re breaking it down into simple steps.
We’ll go over picking your tag name, using markers and spray paint, creating depth with 3D effects, and adding backgrounds that really make your work pop.
So, grab some paper, pick up your favorite markers, and get ready to learn the basics and more.
Let’s start creating graffiti that’s totally you!
Key Takeaways
- Begin with a basic tag and work on shaping your letters to develop your own unique style.
- Use quality markers, spray paints, and caps to get the best effects for outlines, colors, and 3D details.
- Try different styles, colors, and techniques to find what makes your graffiti yours.
Graffiti Tag: The Foundation of Graffiti
A graffiti tag is the basic signature you create and is the core of your graffiti identity.
It’s typically a simple, unique name or combination of letters.
Here’s how to get started:
1. Choose Your Tag Name
Your tag name is your graffiti identity.
And it’s best to keep it short, preferably no more than 4-6 letters, since this will allow you to work with each letter creatively without overcrowding your design.
If you’re unsure, start with your initials, nickname, or even a combination of letters that sound unique together.
Examples: Classic tag names include initials (like “RM”) or monikers like “Zer0” or “Kane.”
Pro Tip: Keep in mind that graffiti tagging is usually done quickly in public spaces, so a short, memorable tag can work in your favor.
2. Experiment with Letter Styles
The next step is to get inspired by different graffiti fonts online or in graffiti lettering books.
That way, you can experiment with how to twist, stretch, or angle each letter.
Try starting with bubble letters, which are easy to shape, and then move on to sharper, more complex styles as you gain confidence.
3. Practice Makes Perfect
Then, draw your tag repeatedly in your sketchbook to get comfortable with it.
Don’t just stick with one design—explore different styles, thicknesses, and line shapes.
Ultimately, aim for a tag that flows naturally and looks cool on any surface.
Materials for Drawing Graffiti
Graffiti art requires specific materials for the best results, especially if you want smooth lines, vibrant colors, and long-lasting effects.
Here’s what you’ll need:
- Stylefile or Sharpie Markers: These are great for outlining and bold lines, especially in early sketches. Sharpies are accessible, but Stylefile markers are specifically designed for graffiti and come with a tri-nib for versatile use.
- Posca and Copic Markers: These are best for color fills and creating gradients. Posca markers offer a broad range of colors, while Copic markers are known for their smooth blending.
- Sketchbook: Invest in a durable sketchbook for graffiti-specific practice. This will be your go-to place for trying out designs, shapes, and color schemes.
- Cutting Mat: Place a cutting mat under your paper to prevent ink bleed-through and protect your workspace.
- Spray Paint Brands: Montana Black, Montana Gold, and MTN are excellent for graffiti. Montana Black is high-pressure and quick-drying, which is great for outdoor pieces. Montana Gold, while pricier, offers rich color quality and smoother control.
- Caps: Caps (the nozzle on spray cans) control the spray width and style.
- Fat Caps: Ideal for broad fills and backgrounds.
- Skinny Caps: Perfect for thin, precise lines or details.
- Specialty Caps: Some caps are designed for calligraphy effects or splatters, which can give your piece a unique look.
- Adobe Color Wheel for Color Choice: Adobe Color Wheel is a free online tool for picking colors that work well together. So, you can use it to experiment with color theory and find complementary colors for fill-ins, backgrounds, and outlines.
Step-by-Step Guide to Building Your First Graffiti Piece
With your tag and materials ready, it’s time to build your first full graffiti piece.
Follow these steps to create a multi-dimensional design with color, effects, and personal flair.
Step 1: Start with an Outline
- Outline Your Tag: Lightly trace the edges of your tag with a pencil. Leave some space between the lines to give the letters more room to “breathe” and look larger.
- Experiment with Proportions: Adjust the size of each letter to get a balanced, eye-catching look.
- Add Graffiti Elements: Throw in some classic graffiti add-ons like arrows, dots, and shapes around the letters. This adds movement and personality to your design.
Step 2: Refine the Outline with a Fineliner
Once you’re happy with your outline, grab a fine-tip marker like a Posca 0.7mm or Copic Multiliner and trace over your pencil lines.
In doing so, the process solidifies your design and creates a clear border.
Eraser Tip: Let the ink dry before erasing your pencil lines. This keeps the outline sharp and clean.
Step 3: Pick Your Color Scheme and Fill In
Picking the right colors can make or break your piece.
Here’s a guide to color options that work well:
- Choose Complementary Colors: Complementary colors (e.g., blue and orange) create a strong contrast that makes the letters pop.
- Use Gradients: For a smooth, complex look, use two or three shades of the same color within each letter. For instance, start with a light shade at the top and blend into a darker shade at the bottom. Adobe’s Color Wheel tool can help you pick the best shades.
Pro Tip: Check out graffiti pieces online for color ideas. You can often find effective palettes by observing what other artists use.
Step 4: Add 3D Effects to Your Piece
A 3D effect adds depth to your design and makes it feel dynamic.
Here’s how to create it:
- Choose a Vanishing Point: Place an imaginary point below or to the side of your graffiti letters.
- Draw Lines to the Vanishing Point: Draw lines pointing toward the vanishing point from every corner of your letters.
- Connect the Lines: To create 3D blocks, connect these lines parallel to the original letter outline.
Once you’ve drawn the 3D shapes, fill them in with darker shades or gradients to create shadow effects.
Step 5: Outline with a Keyline and Add Background Elements
The keyline is an outline that runs around the entire graffiti piece to separate it from the background.
Here’s how to add both effectively:
- Keyline: Draw a thin outline around your piece in a contrasting color. For example, a blue keyline can make warm colors like orange or red stand out.
- Background: Add shapes, bubbles, drips, or patterns around your letters to give your piece depth and structure. Bubbles and arrows are common background choices because they’re simple yet impactful.
Step 6: Add Highlights, Your Tag, and Final Touches
For a professional look, adding highlights and small details can make a big difference.
Let’s go through how you can add them:
- Highlights: Draw small, bright shapes (like circles or lines) on the upper part of each letter to simulate light reflection.
- Additional Elements: For a more complex look, add arrows, dots, or small designs inside or around the letters.
- Sign Your Piece: Add your tag and the year as your artist’s signature. This adds a personal touch and marks it as your unique work.
Advanced Techniques to Level Up Your Graffiti Skills
Different Graffiti Styles to Explore
Once you’re comfortable with the basics, start experimenting with various styles to make your graffiti unique:
- Simple Style: Clean, straightforward letters that are easy to read.
- Bubble Style: Round, balloon-like letters, often used in tags and beginner pieces.
- Semi-Wildstyle: A more advanced form with curves, arrows, and shapes that connect letters creatively.
- Wildstyle: Complex designs where letters blend with intricate connections require more skill to execute.
As you can imagine, each style has its own character and difficulty level, so try them out to see what suits you best.
Working with Spray Paint Outdoors
Once you’re ready to move beyond paper, here are some tips for practicing with spray paint:
- Master Can Control: Spray cans work best when held at a certain distance from the surface. Keep the can closer; for thin lines, move it farther away for wider fills.
- Practice with Caps: Experiment with line thickness and styles using different caps. For beginners, it’s best to start with standard caps and then move to fat and skinny caps as you progress.
- Shake the Can: Always shake spray paint thoroughly to ensure an even flow. This is especially important if you’re using different colors in one session.
- Find Legal Practice Spots: Some places allow artists to paint on walls legally. These are often found in larger cities or art districts. Practicing in a safe space will let you focus on your art without distractions.
Shading, Shadows, and Blending
Advanced graffiti often uses blending, shading, and shadow effects to create dimension and depth.
- Shading: Shade the lower areas of letters or shapes to give them a 3D effect. This works well with markers or spray paint when you use darker shades in one corner and gradually lighten toward the center.
- Shadow Effects: Adding shadows to your letters gives a lifelike, popping effect. Position the shadow on one side of each letter, depending on where you want the “light” to come from.
- Blending Colors: Use two colors and overlap them to create a gradient effect. For instance, blend yellow into green for a neon look. This can be achieved by spraying lightly and moving quickly across the surface.
Tip: Practice blending on a separate surface first to get the hang of it without ruining your main piece.
Building Your Style and Connecting with the Graffiti Community
Finding Your Unique Style
Developing a unique style comes from trying out new things and putting a personal twist on familiar graffiti techniques.
So it only makes sense to experiment, break the rules, and don’t be afraid to make mistakes.
- Inspiration from Others: Follow famous graffiti artists on social media or visit online communities. Platforms like Pinterest, Instagram, and even local art galleries are filled with inspiration.
- Document Your Work: Keep a digital or physical portfolio of your pieces. Reviewing past work is a great way to see your progress and identify elements you want to keep or change.
Join the Graffiti Community
Being part of a community can give you inspiration, support, and feedback.
Here are some ways to connect with other artists:
- Streetpins: A free online graffiti community where you can share your work, see others’ art, and enter graffiti contests.
- Instagram: Follow and interact with artists, share your work, and learn about techniques and trends.
- Local Art Events: Many cities have urban art festivals or graffiti-friendly spaces where you can meet other artists and find legal walls to paint on.
Final Tips for Beginner Graffiti Artists
Here are some final tips to help you build your skills and confidence as a beginner graffiti artist:
- Practice Consistently: The more you draw, the better you’ll get. Make it a habit to sketch in your graffiti notebook daily.
- Experiment with Colors: Try different color combinations and styles to keep things fresh and unique.
- Start Small: Begin with paper or canvas before working on walls. It’s less intimidating and easier to control.
- Stay Persistent: Graffiti art takes time to master, so don’t be discouraged if your first few pieces don’t come out as planned. The journey is part of the process.
Ready to Start Your Graffiti Journey?
Now you know how to draw graffiti—it’s time to grab your sketchbook, markers, and spray cans and start creating!
Don’t worry if your first few tries aren’t perfect; graffiti is all about experimenting, learning, and having fun.
So, go ahead and make your mark. Start small, dream big, and remember—every great artist was once a beginner.
Keep practicing, stay inspired, and get out there to create something amazing!


